Skip to content
Install guide · Polaris Xpedition

Xpedition supercharger.
Every step.

The Packard Rotrex supercharger kit for the Polaris Xpedition XP5 and ADV5: the ECU first, the teardown, the pulley and head unit, intake, the oil system that protects the supercharger, and the tune. Jedd Packard’s install video, chaptered to every step.

0 of 0 steps done
23Steps, each with its own check-off
133FT-LBSPulley bolt, sealed with silicone
85 → 150WHPStock to the intercooled kit on 91
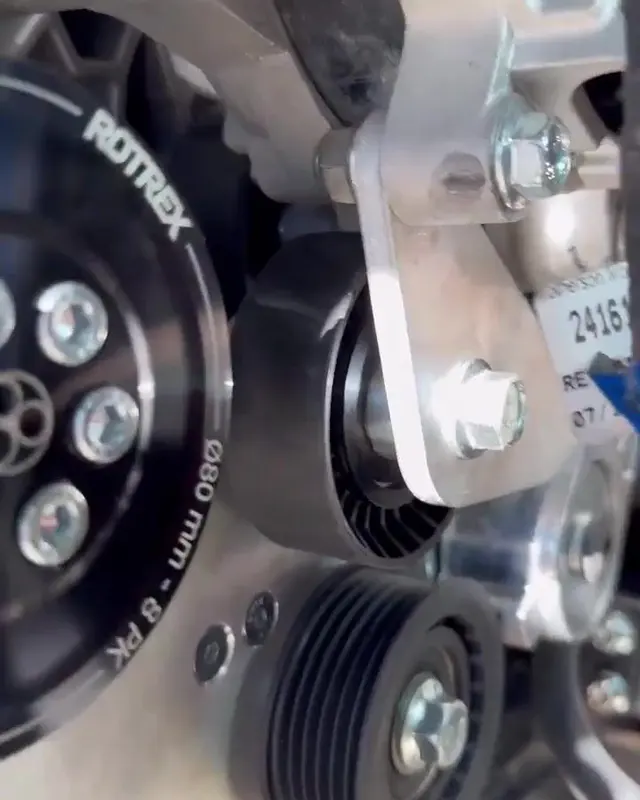
The Rotrex supercharger pulley on an Xpedition

Watch it

The install, chaptered.

Tap a chapter and the player jumps to it; every step below has its own watch button too. The last chapter is the HP Tuners walk-through.

Chapters

Before you start

What you’ll need.

Tools

  • Torque wrench to 133 ft-lbs, and one that reads 7 ft-lbs
  • 4 mm Allen
  • 1/2” ratchet (belt tensioner)
  • Torx drivers (ECU screws)
  • A pry bar to hold the engine
  • Reciprocating saw
  • A fresh razor blade
  • Your Polaris service manual

Supplies

  • Silicone sealant for the pulley bolt
  • Red thread locker for the M6 bolts
  • Rotrex traction fluid, per the booklet
  • A table to lay the kit out on

Know this first

  • Send the ECU in before you start.
  • ADV: the whole bed comes off. About four more hours.
  • Never start it with a dry supercharger. Fill and prime first.

Both Xpedition kits share the bracket system, drive pulley, charge piping, Bosch 1000cc injectors, 3-bar MAP sensor and a secondary-clutch helix; the intercooled kit adds the intercooler. The video doesn’t cover the helix swap; ask us if you want a hand with it.

The install

23 steps.

Check each one off as you go; this page remembers where you are on this device.

01

Before the wrenches

Step 01· Done

Pull the ECU and send it in first

Do this before anything else, so the tune isn’t what holds up the build. The ECU is under the rear seat on the driver’s side:

  1. Pull the middle seat cushion straight out.
  2. Pop the push pins and lift off the cover.
  3. Back out the Torx screws holding the ECU, unclip the connector and lift it out.

Then start your send-in, print the form and ship the ECU (only the module, never the harness) to Clearfield.

Your ECU usually beats the kit home. If you picked Preload, your stock tune stays active and you flash the supercharger tune yourself after the install (here’s how). If you picked Flash now, it comes back with the supercharger tune active, so leave the machine parked until the kit is on.

Step 02· Done

Know which Xpedition you have

The kit fits the XP5 and the ADV5, and the bed is the difference:

  • Truck-bed style: tilt the bed up and install the kit with the bed on.
  • ADV: the whole bed has to come off. Plan on about four more hours of labor.

The machine in the video is an ADV, so you’ll see the full teardown.

ADVabout +4 hours
Step 03· Done

Lay the whole kit out on a table

Take everything out of the box and spread it on a table, so you know you have it all and can reach it quickly.

Follow the Polaris service manual for removing and reinstalling every OEM part. The kit steps below pick up where the manual leaves off.

02

Teardown

Step 04· Done

Cut out the long plastic tube

One plastic tube runs all the way across the machine. The only ways to get it out are to take a lot of the machine apart or to cut it, and it isn’t reused. Cut it with a reciprocating saw and pull the pieces.

It saves a lot of time. The tube doesn’t go back in.

Step 05· Done

What comes off and stays off

With the machine torn down, here’s the pile of OEM parts you won’t reuse, including both halves of that tube. Set them aside; none of it goes back in.

Step 06· Done

Air filter tube off: where the supercharger goes

Remove the OEM air filter tube. That opens up the space where the supercharger mounts.

Step 07· Done

Swap the MAP sensor and injectors

Install the kit’s 3-bar MAP sensor and Bosch 1000cc injectors in place of the OEM parts. Both are straight swaps.

03

Supercharger on

Step 08· Done

Install the rear pulley and torque the bolt

Remove the bolt, then fit the rear pulley portion. This bolt seals oil, so it gets silicone, not thread locker: a bead on both sides of the pulley and on the bolt flange.

Torque it to 133 ft-lbs.

Pulley bolt133 ft-lbs · silicone

The engine will try to turn as you go up to 133. Put a pry bar in the clutch to hold it.

Silicone, not thread locker, and plenty of it. This bolt keeps engine oil in.

Step 09· Done

Mount the supercharger head unit

Remove the plate from the head unit. Its hardware and pulleys go back on exactly the way they came off.

Four M6 bolts hold the head unit: red thread locker on the threads, torqued to 7 ft-lbs with a 4 mm Allen.

M6 × 47 ft-lbs · red thread lockerDriver4 mm Allen

Leave every oil line attached and fully tight on the head unit. They’re hard to reach once it’s installed.

Step 10· Done

Fit the charge tube

Mount the charge tube on the head unit and tuck it down and across, as in the video.

Step 11· Done

Install the front pulley portion

Bolt on the front portion of the pulley with its M6 bolts. Same as the head unit: red thread locker, 7 ft-lbs.

M67 ft-lbs · red thread locker
04

Intake and charge air

Step 12· Done

Trim the rubber mount

Before the air filter tube goes in, cut off the small rubber mount that would push on it. A fresh razor blade goes right through it.

Step 13· Done

Shorten the crankcase breather hose

Trim the crankcase breather hose so it doesn’t kink where it plugs into the air filter tube. In the video that’s about five inches.

Trimabout 5 in.
Step 14· Done

Pull the rear skid plate

Take off the rear portion of the skid plate. That’s how you reach the clamps under the machine, where the air filter tube and charge tube attach to the supercharger.

Step 15· Done

Finish the pulley assembly

With the full pulley assembly in place, the through-bolts take nylon locking nuts on the back side.

Back sidenylon locking nuts
Step 16· Done

Mount the oiling system

The oil system mounts with its filter, the reservoir and the hand primer, with the line coming up from the bottom. The oil lines come pre-installed the way they should be run, so keep them that way.

Step 17· Done

Route the intake

The air filter tube runs across into the supercharger. The silicone U-bend goes on with the OEM clamps reused. Once the OEM piece is off, the intake no longer ties into the clutching; it feeds the air box from here. Watch this step for the routing.

05

Belt, oil and first start

The oil system is the step that protects the supercharger.

Step 18· Done

Route the belt

The supercharger belt wraps around the back pulley, under the idler and all the way forward. You can change it without unbolting anything: put a 1/2” ratchet in the tensioner, pull the tension off, and the belt slips off and back on.

Belt change1/2 in. ratchet
Step 19· Done

Fill the reservoir

Use the funnel that comes with the kit to fill the reservoir with Rotrex traction fluid (SX150 in the video) close to the top. It’s expensive, so don’t spill it, and keep whatever’s left in case you need to top off.

Step 20· Done

Prime it before the engine starts

Pump the primer 7 to 10 times to push oil through the lines. You’ll feel it get stiffer as pressure builds.

Primer7–10 pumps

Never start the engine with a dry supercharger. Fill and prime it first, every time it’s been drained.

Step 21· Done

First start: check the oil running

  1. Start it and watch for oil to reach the sight glass.
  2. With it running, pull the dipstick, wipe it, screw it all the way back in.
  3. Pull it again and read the level. A little high is fine; it may spit a little out. Low, top it off.
Step 22· Done

Read the supercharger booklet

The Rotrex booklet in the box covers priming, ongoing maintenance and checking the oil level. It answers anything the video doesn’t.

Step 23· Done

Flash the supercharger tune

If you picked Preload, your ECU is still on the stock tune. Now that the kit is on, write the supercharger tune with your HP Tuners device. The step-by-step is here. If you picked Flash now, you’re done: go ride.

Torque reference

The numbers.

As stated in the Packard install video.

133FT-LBSRear pulley bolt, sealed with silicone
7FT-LBSM6 bolts: head unit and pulley, red thread locker
7–10PUMPSOn the primer before first start
5IN.About how much breather hose to trim

Questions

Questions installers ask.

Does it fit my Xpedition?

Both Packard kits fit the XP5 and the ADV5. The ADV takes about four more hours because the whole bed comes off.

Do I have to send in my ECU?

Base and Complete kits include the tune, so yes: pull it first and send it in, so the tune is never what holds up the build. Builder kits are hardware only.

Preload or Flash now?

Preload keeps your stock tune running with the supercharger tune waiting; you flash it with your HP Tuners device after the install. Flash now writes the supercharger tune at the shop, and the machine stays parked until the kit is on. It won’t run right on the supercharger tune without the kit. Base kits don’t include a flashing device, so they’re Flash now unless an HP Tuners RTD is on the order.

Thread locker on the pulley bolt?

No. It seals engine oil, so it gets silicone on both sides of the pulley and on the bolt flange, then 133 ft-lbs.

What oil goes in the supercharger?

Rotrex traction fluid, per the Rotrex booklet in the box. Fill the reservoir close to the top and prime it 7 to 10 pumps before the engine starts.

Can I change the belt without taking it apart?

Yes. A 1/2-inch ratchet in the tensioner pulls the tension off and the belt slips off and on.

Stuck on a step?

Tell us your machine, the step number and what you’re seeing. The shop answers by email, usually the same day.

Ask about your install