Skip to content
Install guide · Polaris RZR Pro R

Pro R supercharger.
Bolt by bolt.

The Packard supercharger kit for the Polaris RZR Pro R, from the kit on the bench to belt tension: the head unit, the mount, intake and charge air, the oiling system that has to be right, and the torque numbers that matter. Our quick-guide video, chaptered to every step.

0 of 0 steps done
17Steps, each with its own check-off
13MINQuick-guide video, chaptered to the steps
80–100FT-LBSBelt tension
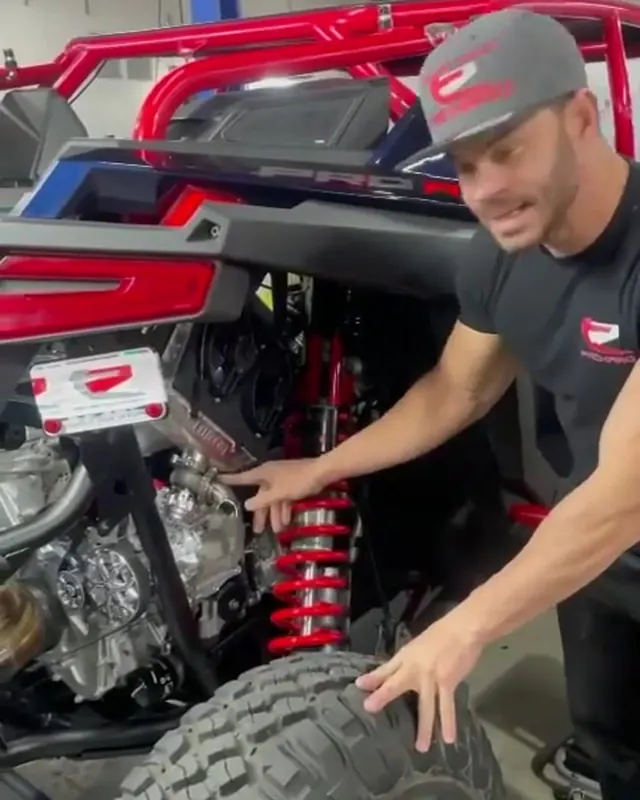
The Packard supercharger on a Pro R

Watch it

The quick guide.

Tap a chapter and the player jumps to it; every step below also has its own watch button.

Chapters

Before you start

What you’ll need.

Tools

  • Torque wrench in in-lbs and one in ft-lbs
  • 22 mm socket (belt tension)
  • T40 Torx (tensioner jam bolts)
  • 13/64” drill bit (reservoir upper mount)
  • Flat-blade screwdriver
  • Side cutters

Supplies

  • Red thread locker for the oil-system brackets
  • Glass cleaner in a spray bottle
  • Supercharger oil, per the supercharger’s instructions
  • A bench or table to lay the kit out on

Read these first

  • The instruction sheet in the supercharger box: oil routing, fill and priming come from it.
  • M6 fasteners strip easily. Torque wrench, never an impact.
  • Never turn the supercharger backward.

The install

17 steps.

Check each one off as you go; this page remembers where you are on this device.

01

Prep

Step 01· Done

Lay the whole kit out first

Spread every component on a table before you touch the machine, so you know what you have and where it goes. Plan for parts that come off and don’t go back on: the OEM belt, the alternator belt cover and a few others that will be obvious once you’re in there.

Pulling the bed isn’t required, but it opens the engine bay up and makes the rest of the job much easier.

02

Supercharger on

Step 02· Done

Build the supercharger head unit

Install the pulley shaft with the supplied M6 bolts, then fit the snout and torque its fasteners to the same spec.

M6 bolts80 in-lbs

Never turn the supercharger backward. The internal pulley must not rotate opposite its running direction; best practice is not to rotate it at all during assembly. Reverse rotation damages the supercharger.

Step 03· Done

Free the tensioner and start the bracket

Remove the tensioner section from its bracket along with the three OEM bolts that pass through it. Reinstall the bracket with those bolts snug only.

You need the play: the supercharger, mount and front plates all have to be coaxed into line, and nothing lines up if this is torqued early. Final-torque it to factory spec once everything is together.

Bracket boltssnug now, factory spec later
Step 04· Done

Slide the supercharger in

  1. Cut the zip tie holding the wire that’s in the way. That’s the clearance you’re missing.
  2. Slide the supercharger in.
  3. Fit the supplied supercharger mount with the OEM hardware.
  4. If the holes are stubborn, pry up lightly on the engine mount to bring them into line.

Start every fastener on every side before you tighten anything. Tighten one early and you’ll be taking it back off.

Step 05· Done

Torque it down, then fit the belt tensioner

With everything aligned, torque the front plates, the supercharger and the mount-to-engine-mount hardware. Then install the belt tensioner assembly. Tensioning the belt comes later, in step 16.

M680 in-lbsM816 ft-lbsM1033 ft-lbs
03

Intake, cooling and charge air

Step 06· Done

Relocate the coolant reservoir

The kit moves the reservoir slightly to the left. Unbolt it top and bottom, then bolt the relocation bracket into the hole the old bolt came out of. Mount the reservoir to that bracket, front bolt first.

The upper tab now sits in a new spot: drill a pilot hole with a 13/64” bit and reuse the OEM self-tapping screw.

Pilot hole13/64 in.
Step 07· Done

Swap the MAP sensor

Unbolt the OEM MAP sensor and bolt the kit’s sensor in its place. A straight swap.

Step 08· Done

Replace the rubber manifold

Swap the OEM rubber manifold between the throttle body and the intake plenum for the supplied one.

Change the bolt here. The OEM bolt at this spot is longer, and once the kit shortens the distance between throttle body and plenum it hits the throttle body. Use the shorter bolt from the kit.

Step 09· Done

Mount the intercooler

The upper mount clamps to the upper frame tube, and the intercooler bolts to that mount. Fit the frame mount first, then set the intercooler on it.

Pulling the clutch piping buys useful clearance. Removing the shock gives you more, but it isn’t necessary.

Step 10· Done

Run the wastegate boost line

With the wastegate installed, run the supplied blue silicone line from the wastegate’s boost port to the throttle body, routed as in the video.

Step 11· Done

Install the charge tubes

Lower charge tube first, then the upper.

Keep a spray bottle of glass cleaner on the bench and mist the silicone bends and couplers. They slide on and off far more easily: worth it everywhere, essential on the air filter tube.

04

Oiling

The part that ends superchargers when it’s done wrong.

Step 12· Done

Pre-assemble the oil system on the bench

Build the reservoir, oil cooler and rear mount as one assembly on the bench. Snug the fasteners that locate the assembly to itself and leave the rest loose; you’ll need that adjustment once it’s in the machine.

Red thread locker on both brackets. Pull the OEM bolt for the bracket and reuse it with red thread locker; the supplied bolt gets it too. This assembly cannot vibrate loose.

Step 13· Done

Install the oil assembly

Mount the front bracket to the frame first. Slide the oil-system assembly in and rest it on that bracket, then torque the retaining bolt. Finish the rest of the cooler hardware once it’s located.

M680 in-lbs

These strip easily. Torque wrench, not feel and never an impact.

Step 14· Done

Plumb the oil lines from the supercharger’s own diagram

The oil-line routing is in the instruction sheet packed in the supercharger box, and it isn’t optional reading. The plumbing runs clockwise. Follow the diagram exactly as printed.

Every plumbing decision, fluid fill and priming step comes from the supercharger maker’s sheet. Don’t improvise and don’t work from memory of another build.

Step 15· Done

Fill and prime before the engine ever turns over

Fill the supercharger with the oil its instructions specify, then run the maker’s initial start-up procedure: the defined process that moves fluid from the reservoir up into the supercharger. It happens before you crank the engine.

Cranking a dry supercharger is the one mistake on this install you can’t undo. Prime first. Every time.

05

Belt and electronics

Step 16· Done

Tension the belt

You need a 22 mm socket and a T40 Torx: the socket puts tension on the belt, the Torx locks it.

  1. Apply 80–100 ft-lbs to the belt with the 22 mm socket and hold it.
  2. Holding that tension, tighten the first M8 Torx jam bolt to 16 ft-lbs.
  3. Tighten the second M8 Torx jam bolt to 16 ft-lbs.
Belt tension80–100 ft-lbsJam boltsM8 · 16 ft-lbs each
Step 17· Done

ECU and wideband, as shown in the video

  1. Unplug and remove the OEM ECU.
  2. Mount the ProEFI unit. Route the OEM harness behind the frame bar, back up and into the ProEFI.
  3. Run the wideband O2 wire back to the rear of the exhaust.
  4. Remove the OEM O2 sensor, fit the wideband sensor from the ProEFI kit and plug it in.
  5. The speed box terminals are color-coded: match each wire to its color and tighten lightly with a flat-blade screwdriver.

The kit in this video runs a ProEFI. If your kit came with a Packard tune for your stock ECU instead, skip this step and follow the tune steps that came with your order.

Torque reference

The four numbers.

From the on-screen specification cards in the Packard quick-guide video.

80IN-LBSM6 bolts: head unit, snout, oil-cooler brackets
16FT-LBSM8 bolts, including both tensioner jam bolts
33FT-LBSM10 bolt
80–100FT-LBSBelt tension, applied with a 22 mm socket

Questions

Questions installers ask.

Do I have to pull the bed?

No, but it opens the engine bay up and makes the rest of the job much easier.

Can I turn the supercharger pulley by hand?

Never backward. Reverse rotation damages the supercharger, so the best practice is not to rotate it at all during assembly.

Why only snug the bracket bolts at first?

The supercharger, mount and front plates have to be coaxed into line. Torque anything early and nothing lines up. Final-torque once everything is together.

What oil goes in the supercharger, and how do I prime it?

Whatever the instruction sheet in the supercharger box specifies, with its initial start-up procedure, before the engine ever cranks.

How tight is the belt?

80–100 ft-lbs applied with a 22 mm socket, held while you tighten the two M8 Torx jam bolts to 16 ft-lbs each.

My kit didn’t come with a ProEFI.

Then skip the ECU step in the video and follow the tune steps that came with your order. Changing fuel or boost later? That’s the second supercharger tune.

Stuck on a step?

Tell us your machine, the step number and what you’re seeing. The shop answers by email, usually the same day.

Ask about your install